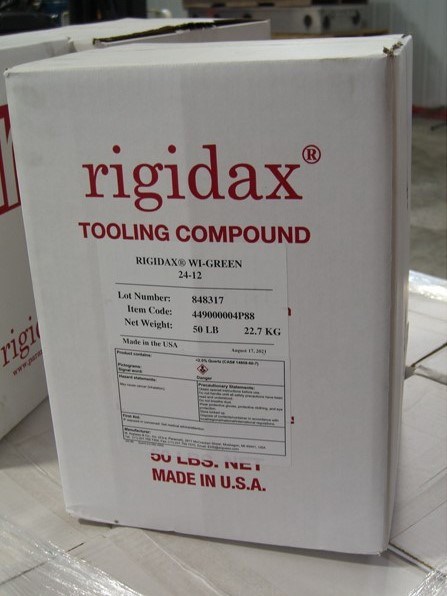
Anyone who has spent time machining thin-wall components, turbine blades, impellers, optical parts, or other irregularly shaped workpieces knows that fixturing is often the biggest challenge in the entire process. Excessive vibration, chatter, distortion, and poor surface finish can quickly turn a precision machining operation into a frustrating exercise.
Rigidax fixturing wax offers a unique solution to these problems by temporarily supporting and stabilizing parts during machining, grinding, and inspection operations.
What Is Rigidax Fixturing Wax?
Rigidax is a castable fixturing compound designed to stabilize, support, and hold parts that would otherwise be difficult to fixture using conventional methods. Unlike standard waxes, Rigidax has been engineered with a low shrink rate during cooling, allowing it to maintain excellent contact with the workpiece after solidification. It can be melted, poured around a part, machined with the part in place, then melted out and reused multiple times.
The material has been successfully used with:
- Aluminum and steel components
- Titanium parts
- Glass optics
- Ceramics
- Quartz
- Fiberglass
- Plastics and composites
Because the wax supports the entire geometry of the part, it can dramatically reduce vibration and chatter while improving dimensional stability during machining.
Common Applications
Rigidax is particularly useful when machining:
Thin-Wall Components
Thin sections often flex under cutting loads, causing poor dimensional accuracy and surface finish. By encapsulating the unsupported area in Rigidax, the cutting forces are distributed across a much larger support structure.
Turbine Blades and Impellers
Multiple interrupted surfaces and complex geometries make traditional clamping difficult. The wax fills cavities and supports blades during milling and grinding operations.
Optical Components
The Blue Rigidax formulations contain no fiberglass filler and are commonly selected when machining or grinding optics where contamination and surface finish must be maintained.
Secondary Operations
Rigidax is often used for drilling, grinding, polishing, deburring, and inspection processes where temporary support is needed but permanent fixturing would be impractical.
How to Use Rigidax
Step 1: Clean the Part
Remove oil, coolant, dirt, and debris from the workpiece. Clean surfaces allow the wax to contact the part more effectively.
Step 2: Preheat the Workpiece
One of the most overlooked steps is preheating.
For maximum holding power, preheat the part to approximately 120°F–180°F before pouring. Preheating improves wetting of the surface and helps eliminate voids between the wax and the workpiece.
Step 3: Melt the Wax
Most Rigidax formulations should be heated to approximately 275°F for pouring. Water-soluble versions should not exceed 200°F. Avoid overheating the material.
When melting Green Rigidax formulations, periodically stir the material to keep the reinforcing fillers suspended. Much like keeping pigments mixed in a can of paint.
Step 4: Pour Around the Part
Place the component in a fixture, tray, or containment area and pour the molten Rigidax where support is needed.
The wax can:
- Fill internal cavities
- Support thin walls
- Encapsulate delicate features
- Reinforce blade structures
- Stabilize complex geometries
Allow the material to cool and solidify completely before machining.
Step 5: Machine Normally
Once solidified, machine the workpiece using the same feeds and speeds normally recommended for the material. In some applications, increased rigidity may even allow more aggressive cutting parameters. None of the Rigidax will cause excess wear on the tooling.
Step 6: Remove and Recycle
After machining is complete, reheat the assembly to approximately 250°F to melt the wax out of the part. The bulk material can be collected and reused repeatedly by adding fresh material as needed.
Residual wax can be removed using mechanical cleaning, hot oil baths, or specialized wax-removal products. When complete residue removal is critical, we recommend using SP-28 wax remover.
Choosing the Right Rigidax Formula
Several formulations are available depending on the application:
Green 24-12
- Most commonly used version
- Contains reinforcing filler
- Excellent holding strength
- Good general-purpose choice
Blue 24-12
- Similar to Green without fiberglass filler
- Preferred for delicate or optical applications
- Easier cleanup
Green 23-8
- Higher viscosity
- Highest level of adhesion
- Excellent choice for flat work holding applications
Blue 23-8
- Higher viscosity
- Useful for optics, impellers, vanes, and turbine wheels
Water Soluble (WS)
- Easiest cleanup
- Dissolves in warm water
- Not recommended when flood coolant contacts the wax during machining
Tips for Best Results
- Always preheat the workpiece when possible.
- Avoid overheating the wax.
- Stir filler-containing formulations regularly.
- Design containment fixtures to minimize wax usage.
- Allow complete cooling before machining.
- Recover and recycle wax whenever practical.
- Test cleanup procedures on critical components before production runs.
Final Thoughts
Many machining challenges are actually fixturing challenges. When conventional clamps, vises, and custom fixtures cannot adequately support a part, Rigidax fixturing wax provides a simple and reusable alternative.
Whether you're machining thin-wall aerospace components, grinding optical parts, stabilizing turbine blades, or supporting delicate prototypes, Rigidax can improve rigidity, reduce chatter, and increase machining success rates while remaining reusable from one project to the next.
For shops that regularly work with difficult geometries, it can become one of the most versatile fixturing tools in the toolbox.